Introduction
Now, that the iPad has been released, I’m sure you are all scrambling for ideas on how to snag a piece of the maket in the imminent gold rush. iCodeBlog is going to help you on your journey with a series of iPad tutorials to come.
Since the iPad uses the same SDK as the iPhone, all of the code under the hood is almost identical. Actually, when looking at the
new and changed API classes, you will realize that most of them are user interface related. This is good news for us since we have already been coding iPhone.
While this tutorial is called “Hello World”, it is really much more than that. I assume you already have working knowledge of iPhone/Objective-C programming.
What We Will Be Creating
In today’s tutorial, I will be showing you how to create an iPad project that uses the UISplitViewController to display content in 2 separate panes. We will also be touching on some of the new design/UI patterns and giving an overall introduction to iPad programming.
It uses a UISplitViewController to display a UITableView on the left and a UIView with a UIImageView subview on the right. This project is actually quite simple to create as the template code provides much of the code we need to get started.
Getting Started
2. Download the resources needed for this project and unzip them
iPadHelloWorldResources.zip . (contains image files and a plist we will be using to load the images)
Creating The Project
Starting a project for the iPad is no different than starting one for the iPhone. When you open XCode and select File->New Project, you should notice the addition of a Split View-Based Application. Select this and name it iPadHelloWorld.
This will create a basic application with a UITableView on the left and a UIView on the right. It will even populate the table with some sample elements. It will add the following files to your project.
Here is a brief description of each of these files:
- iPadHelloWorldAppDelegate – This is similar to every app delegate. If you look in the application:didFinishLaunchingWithOptions method, you will see that the UISplitViewController is being allocated with the MasterViewController and DetailViewControllers.
- MasterViewController – A UITableViewController, nothing fancy. It will be handling the view on the left hand side.
- DetailViewController – This handles the content view that you see on the right hand side. We will be updating this as the user selects different rows in the table to the left. This simply houses a single view.
Go ahead and press Build and Run to check out the application. If you haven’t already done so, play around with the iPad contacts and settings apps as well.
Note: When you launch the application, you will only see the main view since the simulator runs in vertical mode. To see the views side-by-side, rotate the simulator by clicking “Hardware -> Rotate Left/Right”. You can also press CMD->Arrow Left/Right on the keyboard.
Importing The Project Images
Once you have had some time to play with the new iPad project, you will now need to import the images needed for this project. After downloading and unzipping the files in from this tutorial, drag them into the project folder called “Resources-iPad”.
XCode will prompt you to copy the files, check yes and click OK.
Make sure you include all 4 images files as well as the file named fruits.plist.
Displaying The List Of Fruits
Displaying our fruits list is no different than displaying data in any other UITableView. Let’s begin by opening MasterViewController.h and adding a declaration for our fruits array.
#import

@class DetailViewController;

@interface MasterViewController : UITableViewController {
    DetailViewController *detailViewController;
    NSArray * fruits;
}

@property (nonatomic, retain) IBOutlet DetailViewController *detailViewController;
@property (nonatomic, retain) NSMutableArray *fruits;

@end
|
As you can see, there is nothing new here. We simply declare our fruits array and create a property for it.
We will be loading the fruits from the plist file that you imported into your project in the last step. Loading content from a plist file is a very quick and easy solution when you don’t require a database.
Open up MasterViewController.m and add the following line of code to your viewDidLoad method.
- (void)viewDidLoad {
    [super viewDidLoad];
    self.fruits = [[NSArray arrayWithContentsOfFile:[[NSBundle mainBundle] pathForResource:@"fruits" ofType:@"plist"]] retain];
}
|
The file fruits.plist is essentially an array that has been written out to a file. If you open it up, it looks very similar to XML. Now that our fruits array has been populated, let’s implement each of the UITableView delegate and datasource methods to populate the table.
UITableView datasource methods
- (NSInteger)tableView:(UITableView *)aTableView numberOfRowsInSection:(NSInteger)section {
    // Return the number of rows in the section.
    return [fruits count];
}

- (UITableViewCell *)tableView:(UITableView *)tableView cellForRowAtIndexPath:(NSIndexPath *)indexPath {

    static NSString *CellIdentifier = @"CellIdentifier";

 // Dequeue or create a cell of the appropriate type.
 UITableViewCell *cell = [tableView dequeueReusableCellWithIdentifier:CellIdentifier];
    if (cell == nil) {
        cell = [[[UITableViewCell alloc] initWithStyle:UITableViewCellStyleDefault reuseIdentifier:CellIdentifier] autorelease];
        cell.accessoryType = UITableViewCellAccessoryNone;
    }

    // Get the object to display and set the value in the cell.
    cell.textLabel.text = [self.fruits objectAtIndex:indexPath.row];
    return cell;
}
|
Nothing special… We first tell the tableview that we want fruits.count (4 in this case) number of rows.
Next, we display the name of the fruit in each tableview cell. If you want to learn more on UITableViews, read
this tutorial.
UITableView delegate methods
- (void)tableView:(UITableView *)aTableView didSelectRowAtIndexPath:(NSIndexPath *)indexPath {

    /*
     When a row is selected, set the detail view controller's detail item to the item associated with the selected row.
     */
    detailViewController.detailItem = [self.fruits objectAtIndex: indexPath.row];
}
|
Here, we are simply setting the detailItem property of the detailViewController to the selected fruit. We will discuss this property later in this section, but for now all you need to know is that its type is id.
At this point, go ahead and press Build and Run to see your code in action. You should see something that looks like this:
It displays the list of fruits, but nothing happens when you select a cell (well the title of the detailView may change).
Now that we have our list of fruits displayed, we now need to implement the code to display their corresponding image.
Displaying The Fruits
Displaying the selected fruit is actually quite simple. The first thing we need to do is add a UIImageView to our detailView.
Start by adding the IBOutlet for the image view. Open up DetailViewController.h and add the following code:
@interface DetailViewController : UIViewController  {

    UIPopoverController *popoverController;
    UINavigationBar *navigationBar;

    id detailItem;

    IBOutlet UIImageView * fruitImageView;
}

@property (nonatomic, retain) UIPopoverController *popoverController;
@property (nonatomic, retain) IBOutlet UINavigationBar *navigationBar;

@property (nonatomic, retain) id detailItem;

@property (nonatomic, retain) IBOutlet UIImageView * fruitImageView;

@end
|
All of the code here comes with the template except the code to add the IBOutlet UIImageView. Once you have added this open up DetailView.xib in interface builder.
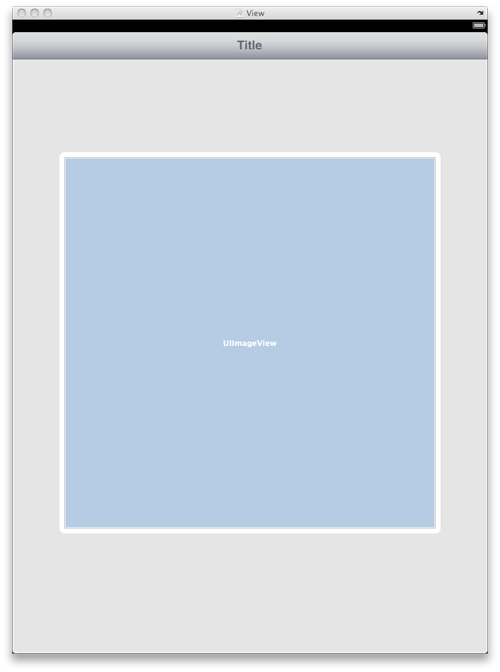
Add a UIImageView on to the view and size it to 500×500.
Now, click on the File’s Owner object and open the connection inspector (Tools -> connection inspector).
Drag from your imageView IBOutlet to the UIImageView and release. The UIImageView is now connected to your outlet.
Note: If you want the images to not skew, set the content mode of the image view (in the attributes inspector) to Aspect Fit.
Now that the imageview has been connected, it’s time to write the code that updates it. Close Interface Builder and open the file DetailViewController.m and add the following lines to the setDetailItem method:
- (void)setDetailItem:(id)newDetailItem {
    if (detailItem != newDetailItem) {
        [detailItem release];
        detailItem = [newDetailItem retain];

        // Update the view.
        navigationBar.topItem.title = detailItem;
 NSString * imageName = [NSString stringWithFormat:@"%@.png",detailItem];
 [self.fruitImageView setImage:[UIImage imageNamed:imageName]];
    }

    if (popoverController != nil) {
        [popoverController dismissPopoverAnimated:YES];
    }
}
|
Most of this code has been added by the template and I won’t discuss it too much in this tutorial. But for now, the important additions are the lines that load the image based on the name of the fruit and the one below it that sets the image property of the image view.
There you have it! Build and go and the application should function as mentioned. Here is another screenshot of the final product.
Another Cool Feature Of SplitViewController
When in vertical mode, the SplitViewController gives you another new UI element called the UIPopOverView. Collin will have a tutorial up soon on this view, but the figure below shows you what I’m talking about.
When the device is vertical, it will automatically rotate your view and provide a UIPopoverView when the “Master List” button is pretty. (BTW this button is also customizable).